Have you ever been curious about the design process behind the golf clubs in your bag? How do clubs continue to make incremental improvements year after year?
These questions and more will be answered, as we go through the design behind creating a golf putter. This process, we are experiencing first hand, as we work to create a 3D printed golf club.
The first step to any good design is market research. Market research can include many things, but ultimately it is anything that helps you understand the end-user, their needs, and their current available solutions.
For golf putters, this requires researching the differences between face balance compared to toe hang and blades compared to mallets. The average length of putters (32 inches to 35 inches) would be noted, as well as the market leaders such as Ping, Titleist, and Odyssey. This fundamental knowledge base will be utilized in further steps.
The next step is to create a list of design requirements. For golf clubs, many of these requirements will come directly from the USGA rules. However, some of these design requirements will come from the market research conducted. What kind of putter are you looking to design and create? What fabrication method (casting, milling, additive, etc) will you be using? A price limit could be an important factor as well or potentially the construction material. Once you create your design requirements, it is helpful to go through the list and assign an important value, as this will help filter the information for later.
After you have your design requirements, you can begin to create some design concepts. The fidelity of these concepts can vary. We usually begin simply by sketching out the design on some engineering or graph paper. Features or design characteristics should be clearly labeled.
While it’s common to like the first concept you come up with, it is beneficial to create as many as you can think of. Once you have your concept designs, go through them and evaluate them based on your design requirements. Determine which ones you want to proceed with.
For our example, we created a half mallet-style putter. This design was chosen for its additional weight but classical shape. By definition, it is a hybrid between the two major putter styles. The putter has its weight centered away from the center in order to increase the moment of inertia.
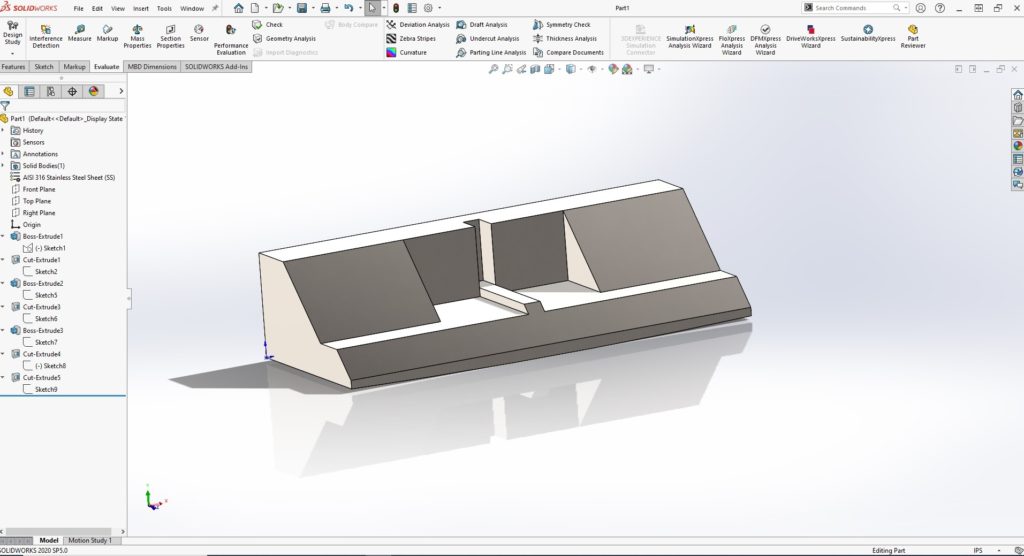
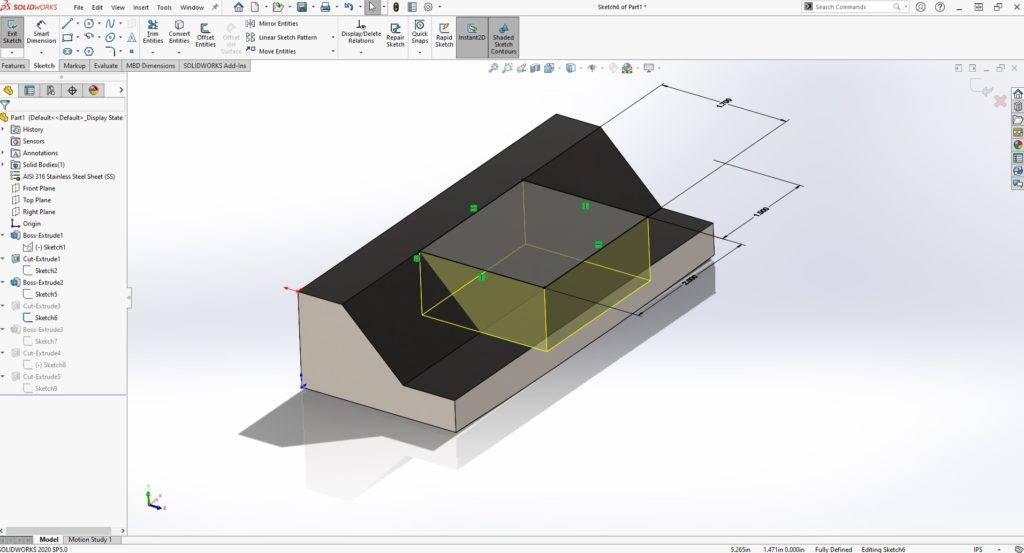
Since we had our design determined it was time to move into creating a 3D model. This is done utilizing CAD (computer-assisted design) software. Our personal preference is Solidworks. It is one of the industry standards in the engineering sphere. It can be daunting at first, but most CAD software is essentially just an accumulation of simple sketch features.
One of the most important things to remember when creating your 3D model is to account for your fabrication process. In our case, we are going to 3D print the design which means we need a completely flat side to adhere to the print bed. We chose that flat surface to be the face of the putter, as it needs to be flat anyways. We also decided to not add the hole for the golf shaft until after the putter is printed. This is because the metal 3D printing process we are utilizing has shrinkage which would be difficult to estimate exactly as the overhang is difficult to print. By not adding the hole, our design can also be used to create both left-handed and right-handed putters.
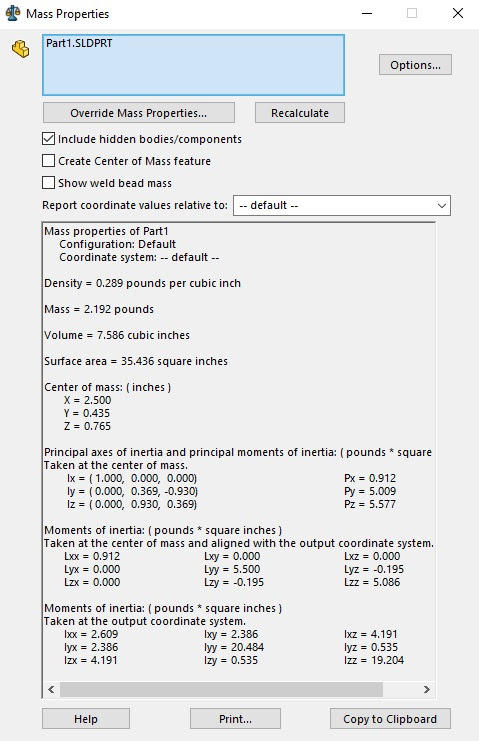
Another factor we had to take into account was that our filament roll is finite. Our 3D printer can only print a maximum of 2.2 pounds of filament. Luckily, Solidworks has an evaluation feature that allows us to estimate the mass properties of the design. Using this we could make sure that the design weighs less than 2.2 pounds of solid steel (the filament has slightly less density than solid steel).
The next step in our design process will be to rapidly prototype our design. For us, we will be 3D printing the design in plastic. This allows us to double-check the design before we attempt to print it with our expensive metal filament process.
Large golf companies will test their prototypes in various real-world experiments. Obviously, CAD software enables certain tests to be run, but real tests need to confirm those results.
Overall, designing a golf club is a time-intensive task, but it can be less technical than you may believe. This process can be modified to fit certain team dynamics and environments.
Understanding the work that goes into it, certainly increases our appreciation for the fabulous engineering that goes into every golf club on the market today.
3 Comments